Building a Simple Rate Limiter with Workers and Durable objects
Building a Rate limiter for distributed systems is a real challenge, being due to their stateless nature, do not maintain any information about previous requests inherently. A rate limiter needs to track the number of requests from a client within a given timeframe. implementing state management in a stateless environment requires external storage solutions like (redis) to track requests counts, which adds complexity and latency.
That’s where Cloudflare Durable objects come in place and perfect match for this type of workload. Each durable object instance has access to its isolated storage and they are designed such that the number of individual objects in the system do not need to be limited, and can scale horizontally.
Components of a Rate Limiter
Rate limiting is a way to control the rate at which users or services can access to a resource, it plays a protecting system resources to ensure a fair resource usage among all users. it can be used in various situations to manage resources efficiently.
Rate limiters usually have three main parts:
Identifier: Something unique that tells each user apart, like an email, user ID, or IP address.
Limit: The max number of times a user can do something in a certain period.
Window: The timeframe for the limit to apply.
In our example we will implement the token bucket algorithm. but can also be implemented using different algorithms each has pros and cons.
we have a bucket that holds tokens, each representing an allowed request. The bucket starts off full of tokens, and new tokens are added at a fixed rate over time. When a request comes in, it consumes a token from the bucket. The request is only allowed if there are sufficient tokens; otherwise, it is rejected.
In our implementation, we will create a Durable Object instance to each identifier, that will allow us to scale horizontally by adding as many instances as necessary. Each instance will have its own storage to monitor the number of requests and tokens. also we'll use a Durable Object alarm to refill the tokens in our bucket at a specified rate.
Initialize a new project
Lets start buy generating a new Cloudflare workers projects by running
npm create cloudflare@latest
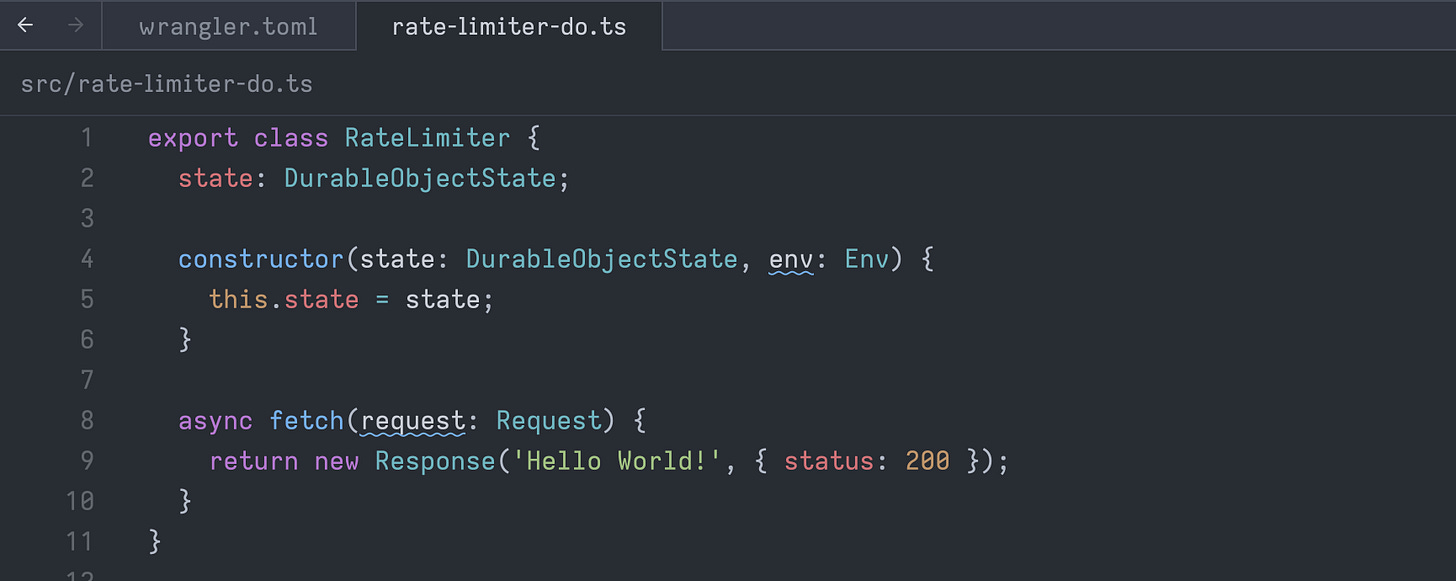
Next, we will create our durable object Class that will contain the logic of our rate limiter.
src/rate-limiter-do.ts
Now we need to create a Durable Object Binding to tell Wrangler where to find it and name of our class.
wrangler.toml
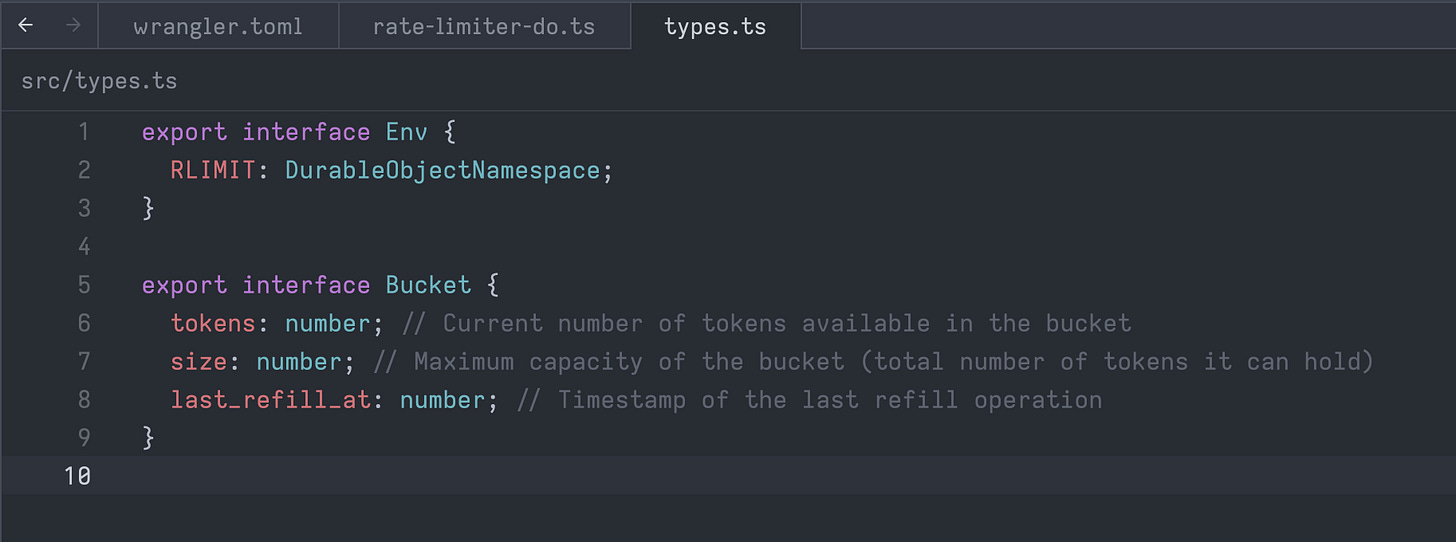
Next, let's create a types.ts file to contain the type definitions for our Bucket and worker environment bindings.
src/types.ts
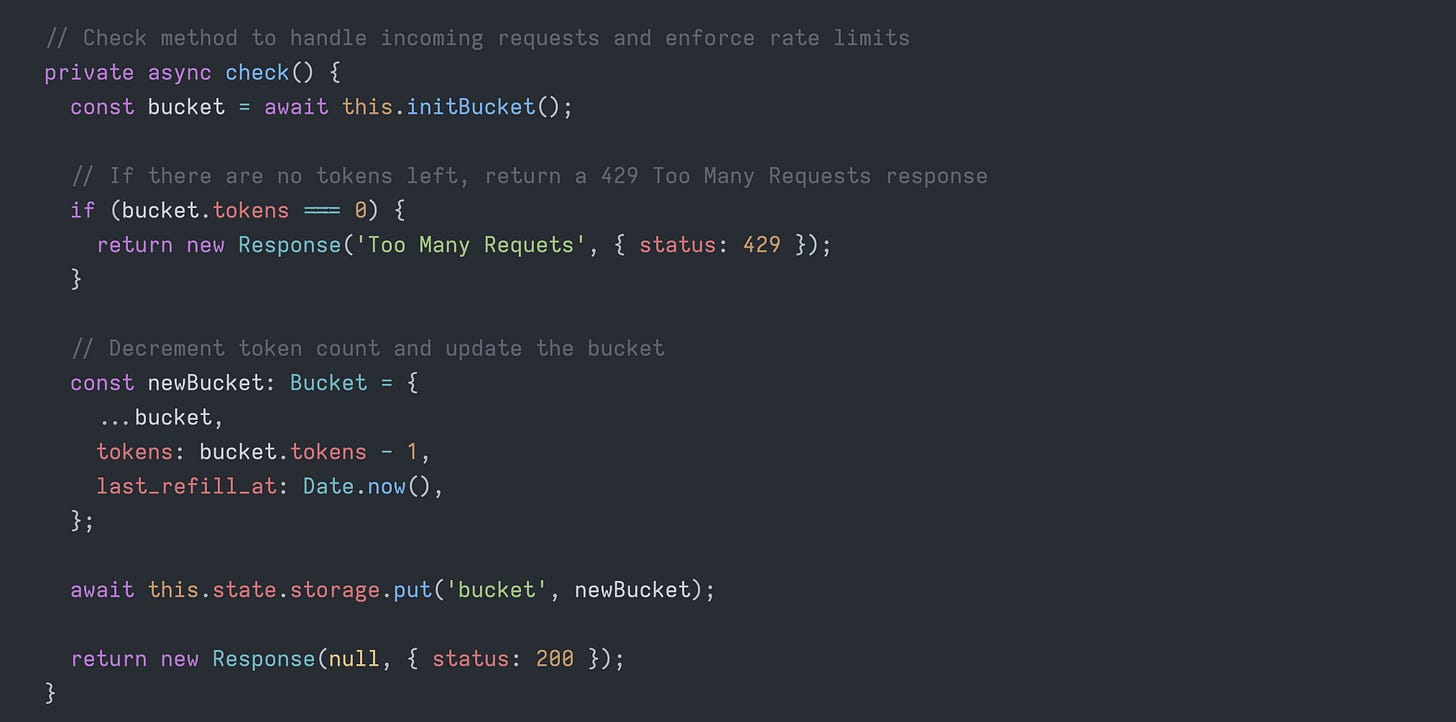
The Durable Object will work like this: it has a fetch handler set up to handle a POST request at /check.
When this check method runs, it looks into the bucket to see if there's enough tokens available for the request. If the bucket has enough tokens, it takes one out, updates the bucket, and sends back a 200 OK response.
But, if there aren't enough tokens, it responds with a 429 Too Many Requests error instead.
The `initBucket` method initializes the bucket in the durable object's storage for the first time. It also checks if the refiller alarm is set up at the specified refill rate. For instance, in our example, we will refill 10 tokens per minute.
const SECONDS = 1000;
const BUCKET_SIZE = 10;
const REFILL_RATE = 1;
Durable Objects alarms enable scheduling the Durable Object to wake up at a future time. When the scheduled time for the alarm arrives, the `alarm()` handler method is triggered. In our use case, the alarm will access the bucket and refill the available tokens according to the predefined bucket size.
Now, the final step is to set up the fetch handler of our worker, retrieve the user's IP from the request headers, and forward the request to the durable object instance.
src/index.ts
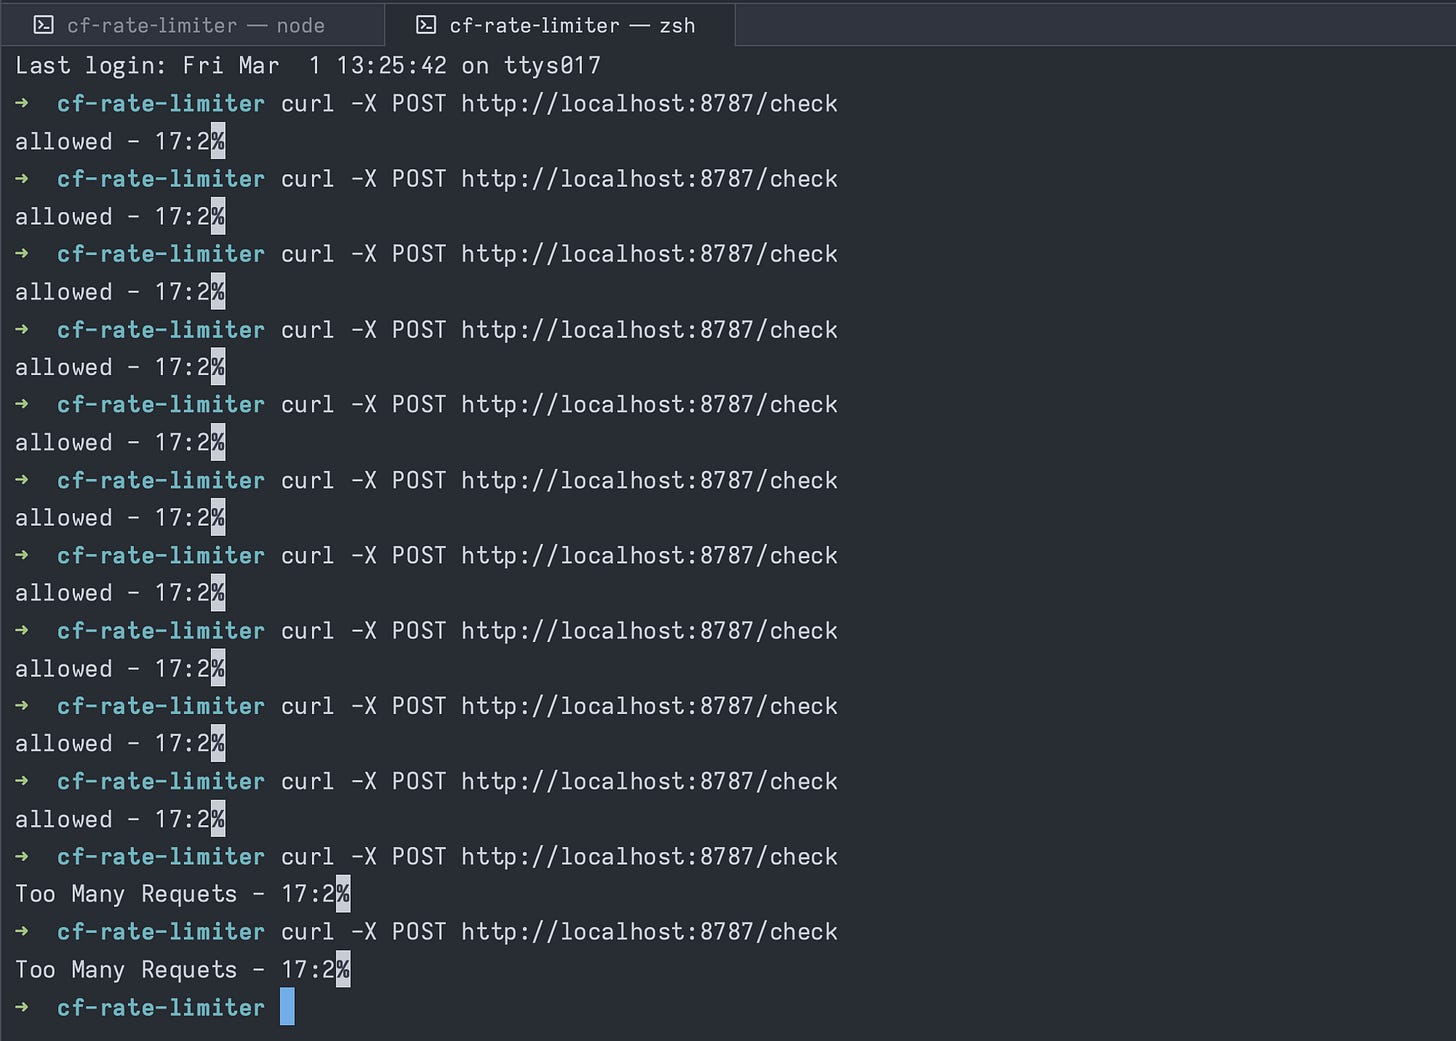
And that's it; we now have our Rate Limiter ready. We can run the npm run dev command to test it out.
As you can see, it allowed 10 requests, but after that, it returned a 'Too Many Requests' response because we used all the tokens.
Publishing the Worker.
Now, to publish our worker to production, we only need to run the following command:
wrangler deploy
In the console, you will see the URL of the deployment.
You can find the complete source code in this github repository.


